Wet Ground & Materials
Puddlecraft has two kinds of water, and they're designed to work together:
| What it is | Timeline | |
|---|---|---|
| Placed puddles | The splats you place, hand-authored. | Fill in the rain and drain slowly (Drain Time), or never (Keep Water). They can be there before it rains, left over from yesterday's storm. |
| Wet ground | Every surface the sky reaches, procedurally. | Darkens and turns glossy within seconds of rain (Soak Time), in patches or drop by drop, then grows procedural puddles until a downpour covers it in water (Puddle Time). Dries in patches soon after the rain stops (Dry Time). |
Here's how a typical shower plays out. The player arrives to find a few half-full placed puddles. The rain starts and raindrops ripple their water. The ground darkens and turns glossy. The placed puddles fill up.
Then procedural puddles appear across the paving, spreading until they meet the placed ones and read as a single puddle. On gravel the ground darkens but no puddles form, unless you placed one there.
When the rain stops, it unwinds in order. The procedural water goes first, then the ground dries, and the placed puddles stay.
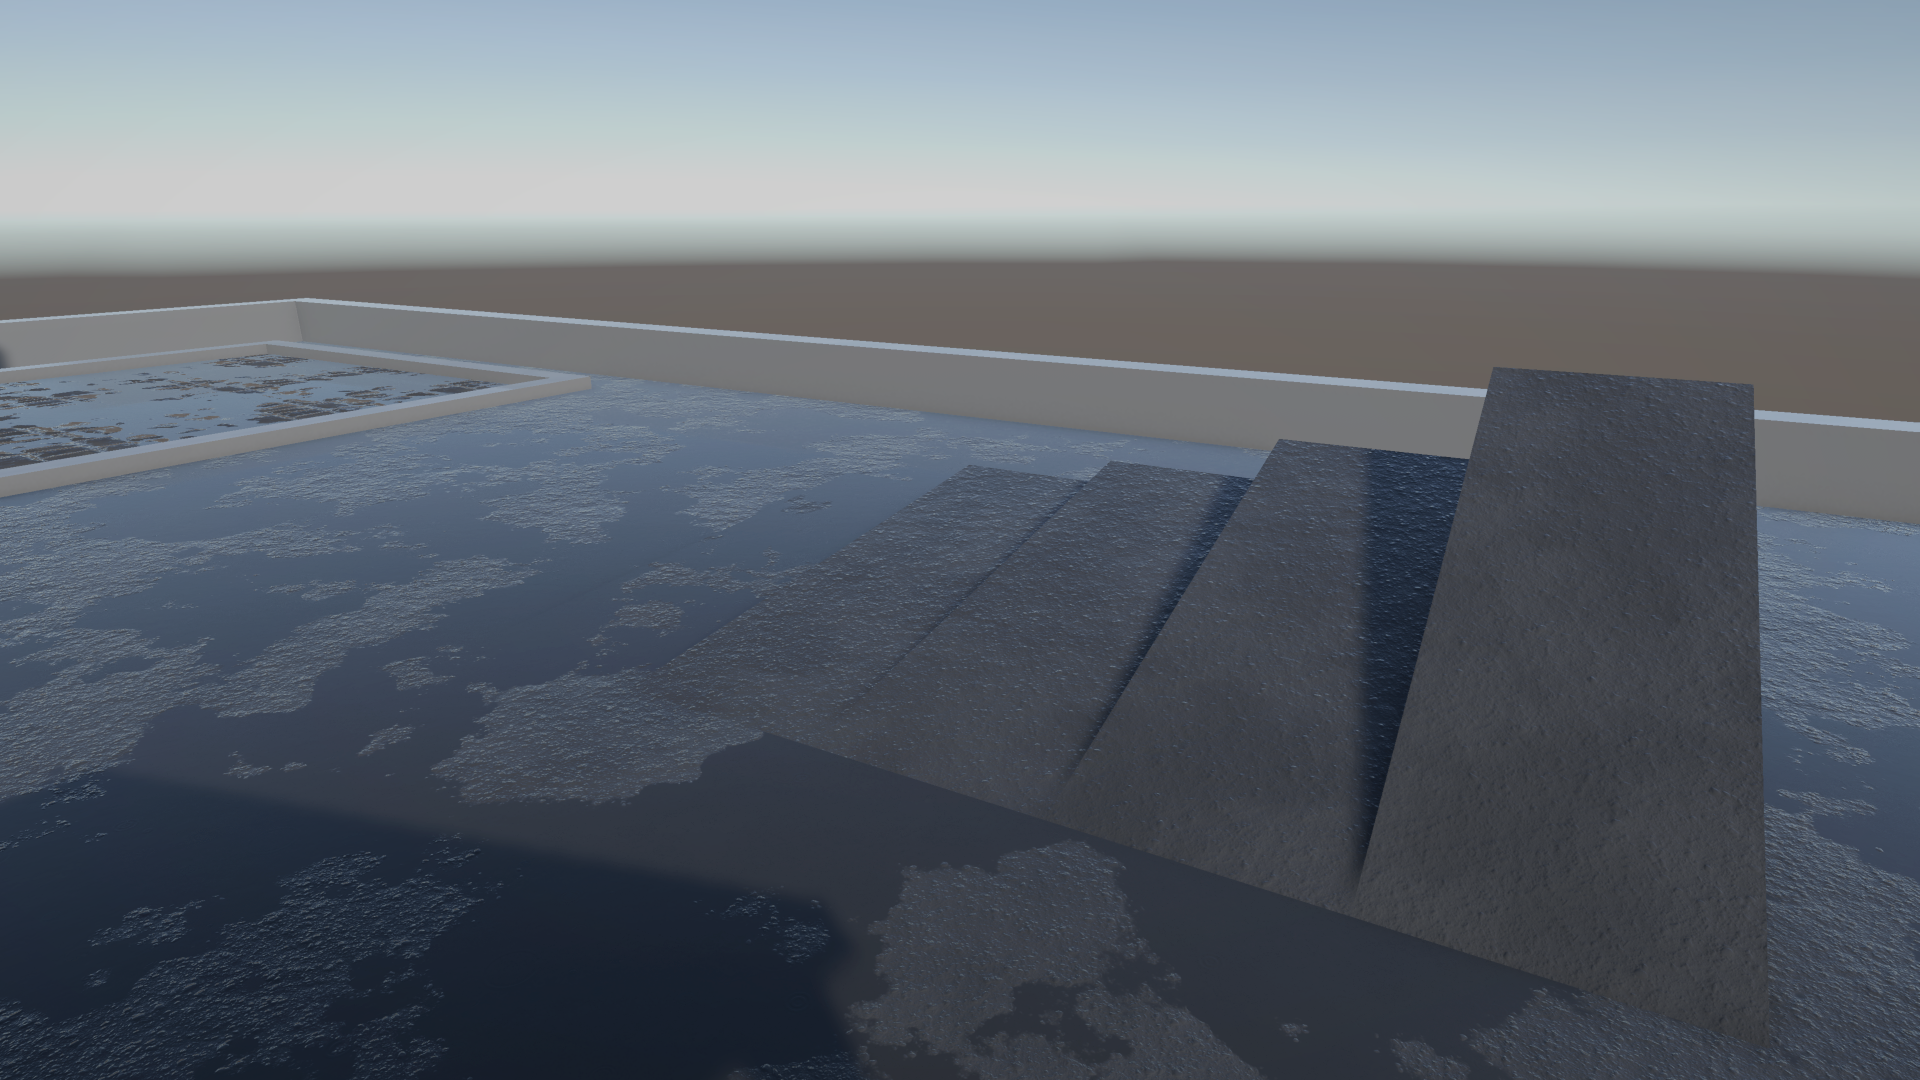
How wet ground looks
Where the sky reaches comes from the rain cover map. Under roofs the ground stays dry, but the wet doesn't stop dead at the roof line: rain reaches a little way in under a roof edge and fades out softly and unevenly (Cover Edge). Wind blows it further in under the windward edge. Undersides always stay dry.
Darkening happens in blotches rather than evenly, and that goes for the ground under standing water too.
Gloss: wet ground turns shiny. The shine itself doesn't move; raindrops only leave small dimples in it.
Getting wet: the ground soaks in patches (Patch Size, Unevenness), or, with Raindrop Wetting on, drop by drop. In that mode, each raindrop in Play mode darkens a small spot wherever the ground is still dry. The spots evaporate unless it pours, so a drizzle leaves sparse speckles (on half-dried ground too), while a downpour soaks the ground through over the Soak Time. Either way, soaked ground dries in patches.
Behind the scenes, the drops are stamped into a small tiling texture (at most 1024 x 1024, made by a compute shader) that's read in a way that hides its repeats. It's freed once the ground is soaked or the spots have dried.
Standing water (placed and procedural puddles) is a darker, flat mirror. Every raindrop sends out a few clear rings, more and taller for heavier drops (Weather > Raindrops per m² per s). Small waves run in from the edges and fade towards the middle, and calm ripples and wind waves move across it.
Reflections: it's all plain surface values, so reflection probes and SSR just work.
Heightmaps: give the material a height (0 at the bottom of the bumps, 1 at the top) and the low areas soak first. Procedural puddles fill the gaps between cobbles before they cover the tops, and so do placed puddles.
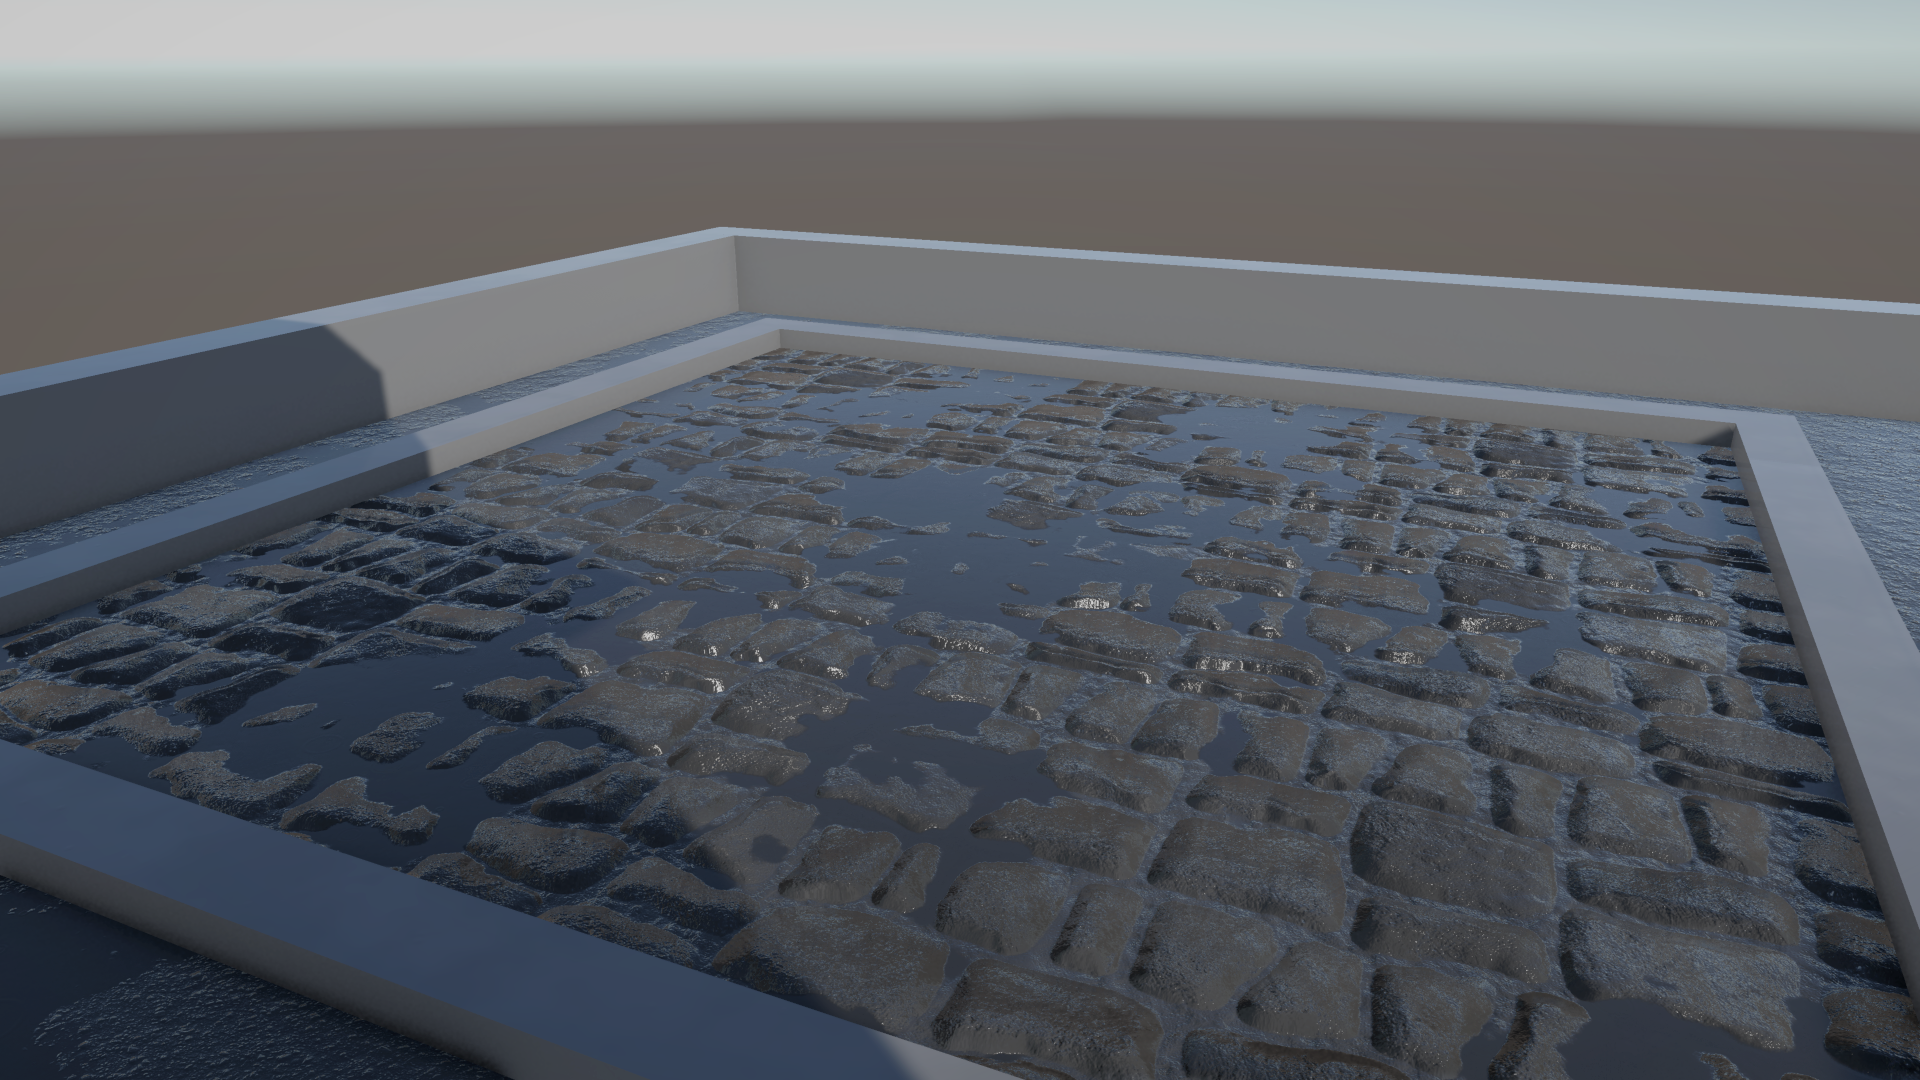
Slopes hold less standing water. The slope caps how far procedural puddles can spread: 95% on a 2° slope, 40% at 5°, and nothing past about 6°.
In heavy rain (procedural puddles past 60%), water starts running down slopes. It begins at about 1° and runs in full from 5°, fading out on steep walls, and the steeper the slope, the faster it runs. Once the rain eases, it calms over Runoff Calm Time.
The shared settings are on the Rain Preset's Wet Ground tab (see Controller & Rain Presets). Procedural puddles all come from one world-space pattern (Puddle Size), so they cross from one material to the next without a seam, and the pattern never visibly repeats.
Per-material settings
Two numbers on each material decide how much it joins in:
- Porosity (0 to 1): how much it soaks up water and darkens. 1 for concrete, stone or wood; 0 for glass, tiles or metal.
- Puddles (0 to 1): how much of it procedural puddles can cover. 1 for paving and concrete; 0 for grass or gravel. Placed puddles show either way.
Choosing the shading mode
Choose Shading on the Puddlecraft renderer feature:
| Shading | How it works | Use it when |
|---|---|---|
| Materials | Your materials draw all the water: wet ground, procedural puddles and placed puddles, merged into one. | You want wet ground and puddles together. |
| Overlay (default) | Placed puddles are drawn over the finished image, on any material. They reflect reflection probes. | You don't want to touch your materials. Materials that do use Puddlecraft still get wet ground and procedural puddles, but those don't merge with the placed ones. |
In Materials mode, materials that don't use Puddlecraft stay dry. Both modes work in Forward, Forward+ and Deferred.
Setting up materials
URP Lit materials
Switch the shader to Puddlecraft/Lit (Wet). It's URP 17.3's Lit shader (Unity Companion License) with the rain added, so every property, texture and keyword carries over. Set Porosity and Puddles under Rain at the top of the material. Give it a Height Map and the low areas fill first.
Turn on Mapping > Triplanar to project the textures along the three world axes instead of using the mesh's UVs. A few things change when you do: the Base Map's Tiling becomes tiles per metre, and parallax displacement is off, though the Height Map still steers the water. Blend Sharpness sets how quickly one projection gives way to the next around corners.
Shader Graph
Add the puddlecraft-wetness node (Create Node > Puddlecraft) between your surface and the Base Color, Smoothness, Metallic and Normal (Tangent Space) blocks. Set its Porosity and Puddles inputs, and feed Height from your heightmap if you have one (leave it at 0.5 if not).
It finds the world position and mesh normal by itself, and in the graph preview it simply passes your values through. Its Wetness output runs from 0 (dry) to 1 (under water), in case you want to drive anything else with it.
HLSL
Call PuddlecraftWetness from shaders/include/puddlecraft-wetness.hlsl:
#include "Packages/com.unity.render-pipelines.universal/ShaderLibrary/Core.hlsl"
#include "Packages/com.dfa.puddlecraft/shaders/include/puddlecraft-wetness.hlsl"

// In your fragment shader, before lighting:
float wetness;
PuddlecraftWetness(positionWS, vertexNormalWS, porosity, puddles, height,
                   surface.albedo, surface.smoothness, surface.metallic, normalWS,
                   wetness);
vertexNormalWSis the mesh normal before normal mapping.heightis your heightmap value (0.5 without one).normalWSis your final normal. It,albedo,smoothnessandmetallicare changed in place.wetnesscomes back from 0 (dry) to 1 (under water), for anything else you want to drive.
Wet tracks
Footprints and tyre tracks left on dry ground after walking or driving out of a puddle merge into the wet ground of Puddlecraft materials, just like rain wetness does. See Wet Tracks.
Limits
Ripples from footsteps, wheels, drips and spouts only travel through water the simulation can see from just above the camera's height, looking down. So a puddle under a roof gets ripples while the camera is under that roof too (inside the room, under the awning), but not while it looks down on the roof from above.
Placed puddles skip steep surfaces (Max Slope on the controller) and surfaces more than 8 cm above or below the baked ground, such as walls, characters and props.
In Materials mode, placed puddles only show in a square around each camera, set by Wetness Map Area on the renderer feature (48 m by default). Wet ground and procedural puddles have no such limit.
Reflections come from your pipeline: reflection probes, or your own SSR. In Deferred, the G-buffer already holds the wet normal and smoothness. In Forward and Forward+, turn on Wet Normals on the renderer feature, and Puddlecraft/Lit (Wet) writes the wet normal to the camera normals texture and its smoothness to that texture's alpha (URP's own materials leave it at 0), where an SSR can read it.
The catch is cost. Whenever something asks for the depth-normals prepass (SSAO, SSR), it then costs about as much as the wet material again, so leave Wet Normals off if you don't use an SSR. Also note that an SSR that reads each material's own smoothness property won't see the wet surface. See Forward, Forward+ and Deferred.